Greeting to all my crafty peeps!
I come to you on this Terrific Tuesday as the Guest Designer Shannon's blog. She is so amazing and we serve on the same design team for JME Creations. On Tuesdays, Shannon likes to share techniques. Well my one turned into 2. I decided that I was going to show a bit about heat embossing and how it makes it easy for coloring. I was one of those kids that would color a picture and then outline the whole thing with black crayon. Now that I am grown and into stamping, I tried this technique and loved it. Here is my warning though: Do not attempt to do this with a stamp with teeny tiny areas. Let me show you the supplies that I used:
 |
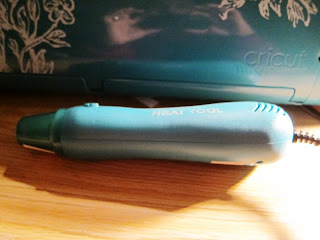
| Here is my embossing gun from a chain store-USE a coupon! |
 |
| Hero Art stamp, $1 stamp from M's, Versamark, black embossing powder and Stampin' Up embossing buddy |
Now do you see how the outline of the bird is raised? Well, when you color it is a great guideline and the color will not bleed beyond the embossed area. Here is my little birdie colored:
Now do you remember that I told you there was a second technique? Well when I began to put this card together it was really late and I wanted something special using ribbon. I must admit that I am bow challenged. Well, I had an epiphany. I took my craft knife (think Exacto) and made two slits beside the paper on the card base. I was able to thread the ribbon through and tie a bow without my hair falling out! Here is what the finished product looks like:
I hope that you have enjoyed my tips and encourage you to try heat embossing. Until next time.....


Thanks for having me :)
ReplyDeleteHappy Scrappin'
Sue B
http://susanascorner.blogspot.com/
Great tip Susan, your project turned out fabulous!
ReplyDeleteGreat card!!! I need to do some embossing..it's been a while! Thanks for the inspiration:)
ReplyDeleteSherrie K
http://sherriescraps.blogspot.com
Great idea. Thank you for the embossing tip. i need to try that.
ReplyDeleteCute card Sue!
ReplyDeleteCarri~abusybee
www.doubleclickconnections.blogspot.com
adorable card -- I just love your talent!
ReplyDeletelove embossing!! Your blog has such cute ideas. I know its a little corny but I wish to share a Butterfly award with you! Thanks for the inspiration! http://mykemmacards.blogspot.com/2011/09/butterfly-award-today-on-one-of-my-blog.html Thanks for inspiring me!
ReplyDelete-Kemma
Really cute card, Susan!
ReplyDelete